Kamis, 29 Juli 2010

Trendy Home-made Ice-Cream

The reason why I am re-posting this because that's  my second entry to the lovely event Cold Desserts hosted by Akheela of Torviewtoronto.

From time to time, I buy a melon………Honeydew. Delicious, cool, pale green honeydew. When I get home from the grocery store, I halve, quarter, slice, peel, and cube the melon and then put it in a Tupperware in the fridge so that I can pluck out chilly cubes for the next few days whenever I fancy a bite of something sweet.
This particular week honeydew sat in the fridge a little too long and lost its bite. Instead of tossing it, I thought I'd use the mushy melon to make some frozen dessert. I don't have an ice cream maker, and the whole process of making ice creams and sorbets has long intimidated me. But quick, before I could psych myself out of it, I dumped the melon and its juices, some powder sugar, and a bit of lime juice into the blender. The result was a divine honeydew smoothie; blended it with Milkmaid and cream. I made ice cream! And not just ice cream, but genuine snooty, unusually flavored, trendy ice cream.

for this you will need:-
1 full very ripe honeydew melon, cut into chunks
1/2 cup powder sugar
1 Tbsp. Lime Juice
100 ml. of Milkmaid (if you are not using milkmaid then increase the quantity of Sugar and Milk/Cream)
300 ml of  Fresh Cream
½ cup Boiled and cooled Milk
that make about 1 liter of Ice-cream….

1. Now Pour in ½ cup Sugar, lime juice and put in the melon chunks into the blender

and churn them into a smoothie. 

2. Pour it in a bowl and mix it with the cream, milk and milkmaid. Blend the whole thing again in batches (according to the size of the blender) again.
3. Pour into a Tupperware and freeze.
4. After say 3-4 hours; take out the whole thing and churn it again and Re-freeze it. Follow this process atleast 2 times. I found that the texture of the ice cream was improved by  two re-blendings.
5. Freeze it again after 2 blending for 4-5 hours and you Ice-cream will be ready.

Note:- You can use this recipe to make this Ice-cream with our regular water melon (Kalingad) and Cantaloupe (Kharbuja). Try it out once...... 

Makai Dhaniya Shorba

Hi friends, I am re-posting this as,this Soup goes to the lovely event Vegetable/Fruit A Month - Corn hosted by Akheela of Torviewtoronto and started by Priya.
Hi to all my dear Bloggo-buddies. The recipe I am sharing with you today is one of my favourite winter recipes. Its easy to make and a meal on its own or is great with a couple of pieces of warm crusty toast . It warms the heart and is a healthy and great comfort food.

For this you need:-                                       
1 cup Sweet Corn 
1/4 Carrot roughly chopped
1 onion roughly chopped
2 cloves Garlic chopped
Coriander Leaves Finely chopped
¼ tsp Cumin
1 tbsp Coriander Seeds, crushed
¼ tsp Turmeric Powder
3-4 Peppercorns
1 Cinnamon Stick(Dalchini)
2-3 Clove (Laung)
1 Bay Leaf
1 cup Milk
2 tsp Oil / Butter
1 cup Water
Salt to taste

For Garnishing:-
Few Corn Kernels, roasted
Few Coriander Leaves, chopped

1. In a non stick pan, heat oil. Add bay leaf, peppercorn, cumin seeds, cinnamon stick and cloves to the heated oil. Sauté the mixture for a while.
2. Add chopped onions and garlic and sauté till the onions become pink.
3. Now, add carrots, turmeric powder and crushed coriander seeds.
4. Add sweet corns, salt, handful of chopped coriander and water. Cook over medium flame for 15 to 20 minutes. 

5. When the corns are properly cooked, remove from the flame and keep it aside to cool.
6. Once cool, put the cooked corn mixture in a blender. Blend to make a fine puree.
7. Strain it properly. Transfer the puree back into the pan and add milk to it to adjust the consistency. Adjust salt and add pepper powder if required.  Simmer it for some time.
8. Garnish with roasted corn kernels, chopped coriander. The luscious Makai Dhaniya shorba is ready to be gorged upon!! 


Minggu, 25 Juli 2010

Instant Rava Masala Dosa

Hi guys!! I know I know , I have been as bad as never before. Neglecting my blog for few days now. Just did not feel like blogging; but now I am back and have something wonderful to share. Wonderful yet very very simple to make. So read on:-

you will need:-
Semolina (rawa/suji) 1 cup
Rice flour 1/2 cup
Maida 1/4cup 
Asafoetida 1/4 teaspoon
Salt to taste
Ginger, finely chopped 1/2 inch piece
Green chillies, finely chopped 2-3 
Dry coconut  grated 3 tbsp.
Chopped coriander 2 tbsp.
Cashewnuts, crushed 12 (optional) 
Peppercorns, crushed 1 tbsp
Cumin seeds, crushed 1 tsp
Pure ghee 2 tablespoons 

1. Blend rawa, rice flour, maida and two cups of water to make a thin (literally) batter. 
2. Add asafoetida and salt. Add ginger, green chillies, grated dry coconut , coriander and crushed cashewnuts to the batter. 
3. Crush peppercorns and cumin seeds and add.


4. Lightly grease a non-stick tawa. Pour a ladle full of batter and spread by swirling the tawa. 
5. Pour a tsp of ghee around and on dosa and cook till it is crisp and golden in colour. Once it gets cooked and becomes crisp; it automatically leaves the side of the pan.


6. Remove and serve hot along with Masala Bhaji, Sambar and chutney. 


Minggu, 11 Juli 2010

Tomato Kadhi

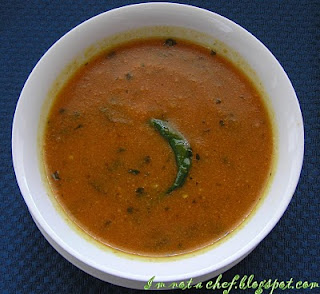
This is a tomato based curry with a lovely balanced tangy- sweet combination. Gujarati and Maharashtrian kadhi has always been a speciality, but when I was exposed to the Tomato Kadhi, I was amazed at how tasty it was, and also how it put a brilliant twist on a traditional kadhi recipe to make a delicious curry that can be savoured with hot steamed rice.  It is a simple one to make than the usual yoghurt/ buttermilk based kadhi. So just read on for the recipe:-


Tomatoes, pureed 2-3 medium
Gram flour (besan) 4 tsp.
Salt to taste
Garlic 2 cloves finely chopped 
Red chilli powder 1 tsp.
Turmeric powder 1/2 tsp.
Cumin seeds 1/2 tsp.
Asafoetida a pinch 
Curry leaves 5-6
Sugar 1 tsp.
Fresh coriander leaves, chopped 2 tbsp.

1. Take gram flour in a bowl. Add salt, red chilli powder, turmeric powder and mix. Add fresh tomato puree ( no need to cook tomatoes, just blend them and strain) and whisk well so that there are no lumps. Add a cup of water and mix.

2. Heat oil and add cumin seeds, a pinch of asafoetida, curry leaves ( i usually crush them or finely chop them for better aroma) and roast till a nice aroma is given out.
3. Add the tomato mixture and mix. Once the mixture comes to a boil, reduce heat and cook for about ten minutes till the mixture is thickened and well cooked.
4. Add sugar if the kadhi is too sour. Add coriander leaves and mix. Serve hot . 

Sabtu, 10 Juli 2010

Mixed Vegetable Cutlets (Restaurant Style)

I have nothing much to say on this particular post. This is another restaurant style (well..you get similar taste and coloured cutlets in most of the restaurant in Pune atleast) snack dished out by me....so read on for the recipe.............. 

Potatoes, boiled and mashed 2 big  
Beetroot, grated 1 medium
Carrots, grated 2 small
Green peas, blanched & crushed 1/2 cup
Oil 1 tbsp + to shallow fry
Cumin seeds 1/2 tsp.
Ginger, finely chopped 1 inch piece
Onion , finely chopped 1 medium 
Red chilli powder 1 tsp.
Turmeric powder 1/4 tsp.
Salt to taste
Cashewnuts, crushed 10 (well... did not use any) 
Refined flour( (maida) /Gram Flour(Besan)/Corn Flour 2 tbsp.
Fresh coriander leaves, chopped 
Lemon juice 2 tsp.
Bread crumbs/ Fine Semolina (Rava) 1/2 cup (i used semolina)


1. First heat 1 tbsp.of oil in a pan. Add cumin seeds, ginger and onion and sauté for two minutes. Add  red chilli powder, turmeric powder and sauté for a minute. 
2. Add beetroot,carrot, green peas and mix. Add salt and continue to sauté for two minutes. Adding salt at this time will make vegetables leave the water. 
3. Take out the vegetables once they are completely dried and cooked with no water content and let them cool down.
4. Now in a bowl add crushed cashewnuts(if you are using), the vegetable mixture, refined flour,  mashed potatoes in a deep bowl. Add coriander leaves and adjust salt. Add lemon juice and mix. 

5. Take a portion of the mixture, shape the cutlets and roll in breadcrumbs/semolina. Similarly prepare more cutlets.
6. Heat sufficient oil in another pan. Shallow fry till both the sides are evenly golden. Drain and place on an absorbent paper and serve hot.

Selasa, 06 Juli 2010

Eggless Chocolate and Walnut Cake


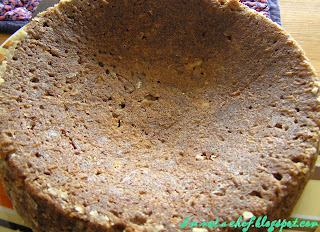
Kayani Bakeri,Camp,Pune serves the best Chocolate and walnut Cake. Its gooey from inside unlike most of the cakes that are dry. I didn't make it like the one from kayani bakery, mine was also dry but very tasty. The only hitch is that it crumbles very fast due to walnuts.
Read on for the recipe:-
 
Here is the list of ingredients I used:
1 Cup Maida / Refined Flour
170 ml Condensed Milk + chocolate (Nutella) sauce (Milkmaid 100 ml and chocolate sauce 70ml)
1/2 Cup melted butter
1 tsp. Vanilla essence ( optional)
2 tbsp. (yes tbsp.) Baking Powder
1/2 cup Milk 
1/2 cup  chopped walnuts
 
Here is how you make the batter:
1. Preheat the oven at 180 0 C.
2. Grease and dust baking dish with butter and refined flour respectively.
3. Sieve flour with baking powder 3 times ( for better air circulation). Keep Aside.
4. Cream together butter and milkmaid chocolate sauce mixture. When it becomes light and soft; add vanilla essence ( optional).
5. Then add the sieved flour in the mixture and mix the batter properly in one direction. Add milk as per the requirement ( 1/2 cup milk is enough) to adjust the consistency of the batter.
6. Just before you transfer the batter into the baking mould; add chopped walnuts and mix lightly. Pour Batter into the Baking dish, and bake it for about 35-40 mins at 180 0 C.
7. Test by pricking the cake with a clean Knife and if it comes out clean then the cake is done.
8.Let it cool before unmoulding and cutting.
Your eggless chocolate and walnut cake is ready.

ohh....and don't forget to grab a slice....