Rabu, 15 Juni 2011

Dum Aloo


Dum Aloo belongs to North Indian or more specifically Kashmiri cuisine. The potatoes, usually smaller ones, are first deep fried, then cooked slowly on low flame in a curd based gravy with Indian spices. The recipe that I am posting here has a little change in the original recipe. Read further.......

Baby potatoes 8-10 
Oil to shallow fry  + 1 tbsp. 
Onion , roughly chopped 1 small  
Cardamom powder 1/2 tsp
Ginger-Garlic paste 2 tsp. 
Red chilli powder 1 tsp. 
Coriander powder 1 tbsp.
Turmeric powder 1/2 tsp.
Cashew nuts handful of them 
Tomato puree 1/2 cup  
Yogurt, whisked 1/4 cup  
Salt to taste 
Honey To taste
Dry fenugreek leaves (kasuri methi) 1 tsp.
Fresh cream  3-4 tbsp

1. Peel, wash potatoes. Par-boil them till they are half or 3/4 done. Remove them from water and pat dry them.
2. Heat sufficient oil in a kadai to shallow fry the potatoes and  fry the potatoes till lightly browned. Drain onto an absorbent paper and keep aside. 
3. Boil onion and cashew nuts with very little water for two to three minutes. Grind into a fine paste. 
4. Heat 1 tbsp. of oil in a pan. Add boiled onion - cashew paste. Cook till fat starts to separate. 
5. Add ginger paste and garlic paste. Stir for some time. Add the tomato puree and stir fry again for 2-3 mins.
6. Add red chilli powder, coriander powder, turmeric powder and yogurt. Mix well. 
7. Add deep-fried potatoes. Add approximately two of water and salt. Let it simmer for some time. Finish with kasoori methi, fresh cream and honey. Serve hot.

Rabu, 04 Mei 2011

Fikabröd/Vetebröd

This bread is a ubiquitous Scandinavian holiday treat, but can be made year round to enjoy with a cup of tea or coffee.  In Finland, this bread is known as Pulla or sometimes Nisu depending on the region and often formed into pitko, a braid shaped loaf.  In Sweden, this bread may be referred to simply as Vetebröd or specifically as Kardemummabullar (bullar for buns) or Kardemummabröd (bröd for bread loaf).  In Norway, this bread is called Julekake (direct translation yule cake) and is almost always made with raisins.

This bread is a typical Fika Item; Fika means "to drink coffee," usually accompanied by something sweet. Fika is a social institution in Sweden; it means having a break, most often a coffeebreak, with one's colleagues, friends, date, or family. The word has quite ambiguous connotations and can mean anything from taking a break from work or other activities, to going on a date. This practice of taking a break, typically with a cinnamon roll or some biscuits or cookies, or sometimes a smörgås or a fruit on the side, is central to Swedish life, and is regularly enjoyed even by the government.

Although the word may in itself imply "taking a break from work," this is often emphasized using the word fikapaus ("fika pause") or fikarast ("fika break"), with kaffepaus and kafferast, respectively, as near synonyms. Fika may also mean having coffee at a café or konditori (a "patisserie-based coffeehouse").

Traditionally, fika requires sweet, baked goods, especially cinnamon rolls. It is also combined in words such as fikabröd ("fika bread") which is a collective name for all kinds of biscuits, cookies, buns, etc that are traditionally eaten with coffee. Non-sweetened breads are normally not included in this term (even though these may sometimes be consumed with coffee). It is also used as a noun, referring to fikabröd and coffee combined.

This is something I had it for the first time here in Gothenburg and absolutely loved it. Don't get disappointed by the length of the post as it is very easy to make and requires only 7 ingredients. So let me share the recipe with you all guys:-
So here goes...


2 1/2 cups flour
3/4 cups milk
1/8 cup sugar, plus one spoonful for glaze
1/8 cup butter
1 egg
2 teaspoons cardamom, preferably seeds but may substitute powder if desperate
2 1/4 teaspoons yeast
Makes about 2 medium size loaves.

1. Let’s start with crushing the cardamom seeds.  You can substitute powdered cardamom, but using crushed seeds will give a more authentic appearance and taste to the bread. 
2. Now to start the bread.  Timing is a bit important, as yeast only survives for a few hours and you want it to be as happy as possible so your bread comes out fluffy.  So don’t plan to start this recipe and then stop halfway through and try to pick it up the next day.  You need a somewhat undisturbed four hour window to complete the process.
3. Yeast is happiest when it is warm, but not too warm!  Heat 3/4 cups of milk to a little over lukewarm.  
4. Add at least 1/8 cup of sugar.  More is okay if you have a sweet tooth.  Sugar is yeast’s favorite food. Now add the 2 teaspoons of previously cracked cardamom seeds.
Stir to dissolve the sugar.  


5. Add 2 1/4 teaspoons of yeast to your slightly warm, sugary milk.  Your yeast is going to be very happy! Stir gently to dissolve the yeast. Beat the egg, add to the mixture leaving some for the brushing later on and stir gently.

6. Add the flour, starting with about 1 1/2 cups, mix in with a spoon, you will have to start using your hands to knead in the remaining 1 cup.  Kneading takes a bit of energy.  Just keep pressing the dough down as hard as you can, then folding in half and pressing down as hard as you can over and over again until the dough is more elastic than crumbly.


7. Once your dough is well kneaded, melt 1/8 cup of butter and pour over the dough.


This is a good time to turn on your oven to 200 degrees.  You want to preheat the oven to 200 degrees and then turn it off.  This is where your bread is going to rise for the next two hours.
8. Knead some more to integrate all the melted butter. You should end up with a nice ball of elastic-y dough that looks like it will barely make one loaf of bread.  

9. Hopefully by now, your oven is preheated to 200 degrees.  Turn the oven off.  Very important.  You don’t want to upset the yeast.  You just want to keep it from getting the chills.  The oven should be little more than lukewarm.  Leave the glass dish in your unheated oven for about two hours.  Or you can take it out a little earlier if easier for you, let’s say 1 1/2 hours, but then you should try to make up that 1/2 hour on the other side of the next step before baking.  After two hours, your ball of dough should be giant!  Now you can see it will make two loaves. 

10. Punch down into the ball of dough and knead a few more times.  It will deflate slightly when you punch it down in the middle.  Not to worry, it will rise again! now finally the dough is ready.
11. Now to braid the loaves, roll them out in a big oval shape and cut the edges as shown in the picture below. I prefer to roll them on a baking sheet  or a aluminum foil so that it becomes easy to lift and put it on the oven.


12. If you want to add any filling in this bread, its a good time to add it . Fill in the stuffing in the middle and start closing the the pleats one by one. At the end this is what you get.


13. Braid both loaves.  Let sit for about 20 minutes to continue rising.  Or add up to half an hour to that if you interrupted the rise earlier in the process.  Don’t let it sit for longer though because it will start to deflate as the yeast dies (remember they only live for a few hours) and then the bread will end up small and tough.
14. To glaze your cardamom bread, use the earlier beaten egg and brush on right before baking.  Sprinkle with a spoonful of sugar, or any topping you prefer, such as sliced almonds.  Glazing is an essential step for all cardamom breads in every region, whether you call it Pulla, Nisu, Vetebröd, Kardemummabullar, Julekake or something else.  

15. Bake loaves or buns for 20-30 minutes at 200 0 c. Bread browns easily, so keep an eye on it.  When you are able to stick a tooth pick in the bread and have it come out clean, the bread is done.

Rabu, 13 April 2011

Appam with Vegetable Stew ( No yeast Recipe)

The joy that is no more a Joy!
Cooking………………It used to be  really a joy…….But nowadays it bugs the hell out of me because it has become an everyday chore……..Don't feel like cooking at allllllllll………….
It’s been almost 4 months….and what’s really changed in the last 4 months?
Have I started updating my blog regularly?
Have I  read other blogs and commented on them for their good work?
Have I  read my own posts for that matter?
have I participated in any blog events?
Have I done something nice for someone without expecting anything in return?
Have I felt positive about certain things?
Do I feel nice when I visit Nordstan?
Have I finally settled down in Gothenburg?.............................

Noooooooooooooo………not much has changed……. its still the same; the way it has been for last 4 months…..I still hate Gothenburg….. the weather still sucks out here…….I want to go back……wait a minute…not to India…..to Germany….

Anyway I know nothing is going to change…so let me get back to the post…..

Appam known by many names-Palappam,Vellayapam...Appam is a fluffy rice pancake made originally with toddy which gives it the unique sweet and sour taste. It is a quite popular breakfast item in Kerala. It is often served with kadala (kala chana) curry, vegetable stew or any other meat stew. The proportions vary from household to household. Most recipes use yeast for the fermentation of the Appam batter. But this is a no yeast recipe.

Raw rice – 1 cup
Cooked rice – 1 cup
Grated fresh coconut – 1 cup
Salt to taste
Baking powder – 1 tsp

1. Soak the raw rice for 4-6 hours.
2. Grind to a smooth batter adding the cooked rice ( completely cooled down) and grated coconut and enough water.
3. Mix well and keep it covered for 8-10 hours for fermentation.[I keep it overnight in the oven]
4. Next morning add the baking powder and salt, add more water if the batter is too thick-it has to be of pouring consistency.
5. Heat a non stick appa chatti[appam pan] or any non stick kadai or any normal pan.
6. Pour a ladle full of batter into the pan when it is hot and swirl the pan in a clockwise motion spreading the batter to the sides of the pan.
7. Swirling the pan gives the appam the customary pretty lace edges and a spongy, thick center.
8. Close the lid and cook on medium heat for about 2-3 minutes. You don't need to flip over the appam and roast it from the other side, it should be cooked only from one side.
Remove the appam to a plate and serve hot with Vegetable stew.

Senin, 04 April 2011

Sachin Tendulkar's Proudest Moment


"I couldn't have asked for more," said Tendulkar". "Winning the World Cup is the ultimate thing. It is the proudest moment of my life. It shows it is never too late.
I thank my teammates who were fabulous. I could not really hold back my tears. These are happy tears so I don't mind crying." : SACHIN TENDULKAR

CONGRATULATIONS TEAM INDIA!!!
conquered the coveted victory........ :-) :-).... though Dhoni has taken all the credit......I am sure....Sachin is the Happiest person in this world!!
Indian Currency Should have Sachin Tendulkar's Photo......Sachin's Birthday should be declared as a National Holiday............ :-) :-)
I could not post this earlier ; coz I was tooo Preoccupied with the celebration....and trust me....its not yet over.....the Winnin Fever is stilllllll Onnnnnnnnnnnnn......... 
and now for the celebrationsssss:-  Chicken Satay with Peanut Butter Sauce
will share the recipe in the later post....NJoy!!!!!!!!!!!

Proud of you Sachin!!

Sachinnnnnnnnnn.............Sachinnnnnnnnnnnnnnnnnn............Sachinnnnnnnnnnnnnnnnn.........Sachinnnnnnnnnnnn

Senin, 21 Maret 2011

100th Post and Awards

100th Post and I am bombarded with awards....Thank youuuuuuuuu...Archana...and Seema. I cant think about anything else other than celebration so have nothing much to say really..once again Thank You girls..People please do vist their lovely blogs. And now the list of awards...

Awards that I received earlier and shared again this time:-


and now some new awards...

Check http://i-m-not-a-chef.blogspot.com/2010/08/narali-bhat-coconut-rice-and-awards.html for the 7 facts about me which I have already posted


I would love to pass these awards  to my fellow blogger- friends and I am very happy to share these with all my lovely blogger buddies as I think its very unfair to select some....I know it feels special to be nominated still..... So, would like to share the awards with all my blogger friends. Please feel free to accept it. Thanks for your support and encouragement!

Kamis, 17 Maret 2011

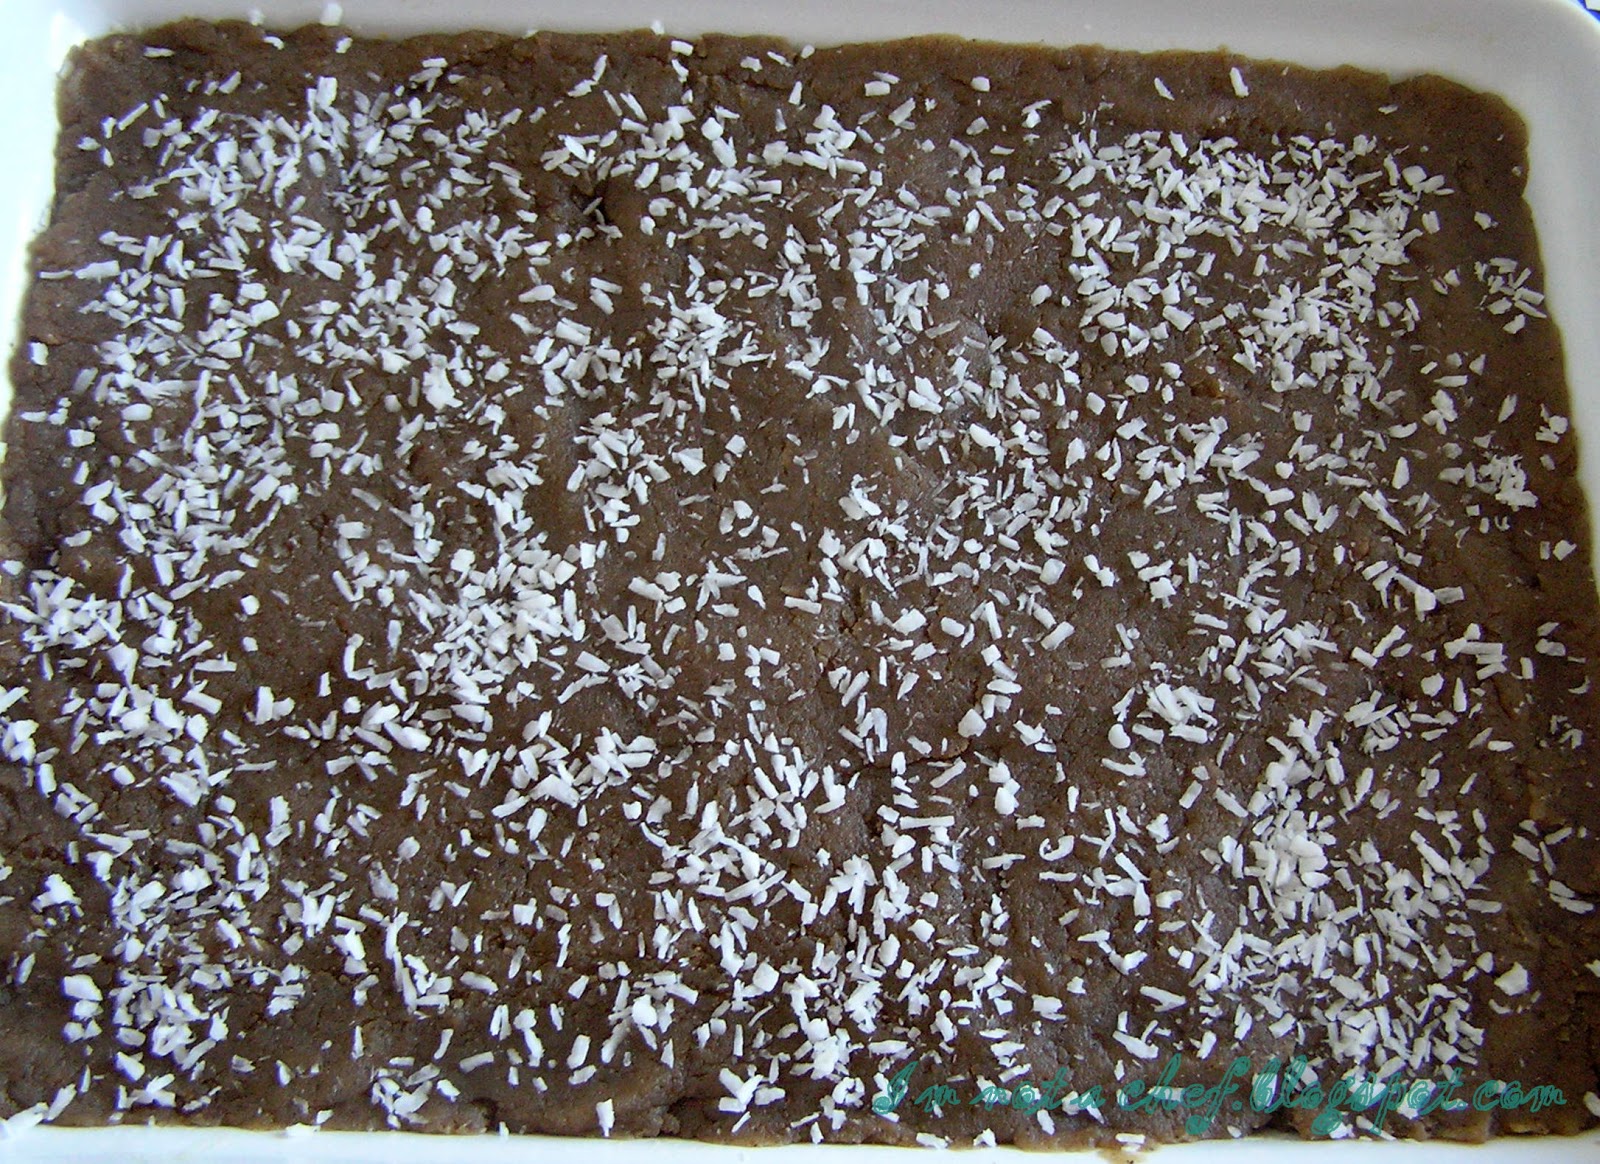
Singhara Barfi


Singhara flour is an ingredient that is commonly used for making various dishes during fasts. You can prepare many mouth watering dishes with singhara flour, such as kheer, ladoo, Thalipeeth (Pancake),  burfi etc.; it can also be used  as a binding agent while making Sabudana wadas , kachoris. Singhara burfi is a sweet dish that you can enjoy with other meals that you have eat during fasting. Its very simple to make and tastes yummy; so lets take a look at ingredients:-


1/2 Cup MilkPowder/ Khoya
3/4 Cup Powdered Sugar
1/2 cup Singhara flour (Water chestnut flour)
3-4 Tbsp Ghee
1/4 Cup Milk
1/2 Tsp Cardamom Powder 

1. Stir-fry flour in ghee in a heavy pan to a light pink color over low flame. 
2. Next stir in milk powder / khoya and roast it too for a while along with the flour. 
3. Now add the powdered sugar and milk and mix it well. Also mix in cardamom powder. Let the mixture get cooked completely. When the mixture starts to leave the sides of the pan that is when it is completely cooked. The mixture will look brownish in colour.
4. Transfer the mixture into the greased tray.  Level it, decorate it with chopped cashewnuts/almonds. ( I used desicated coconut) and cool it.


5. When cool and set, cut into pieces, using a sharp knife.The Barfi is ready to serve.

Selasa, 15 Maret 2011

Home-Made Schezwan sauce (Sichuan Sauce), Vegetable Schezwan (Sichuan) Fried Rice, Chicken Schezwan (Sichuan) Fried Rice

This one is my favourite. But somehow I don't like the bottled Schezwan Sauce (why, i have no idea), but love the sauce that you get in good chinese restaurants. So I decided to make it at home as it is very easy to make.Read on for a simple recipe..........


Schezwan Sauce ( Sichuan Sauce):-
Dried red chillies, 10-12 (deseeded and soaked in water for 1-2 hrs)
Garlic 10-12 cloves finely chopped
Ginger, grated/finely chopped 1 inch piece
Oil
Red Chilli sauce (readymade) 2 tbsp.
Salt to taste
Sugar a pinch
Soy sauce 1 tsp.
Vinegar 2 tsp.

1. Remove red chillies and discard the water. Now grind them into a fine paste with fresh water. (watch out for consistency…..it should be a paste)
2. Heat enough oil (oil acts as a preservative in the sauce when stored for a longer time) and add garlic and ginger and sauté it well.
3. Next add the red chilli paste and continue to saute till the oil starts separating.
4. Next add the soy sauce (do not add too much just a tsp or two, otherwise the sauce will get a different colour) and red chilli sauce. Add salt and a pinch of sugar. ( adding sugar will not make sauce sweeter, but it will cut down the pungent flavour).
5. At this time add little water to get the sauce consistency. Add vinegar and give the sauce one last boil and switch off the gas. The home-made Schezwan sauce is ready.


Vegetable Schezwan Fried Rice:-

Cooked Rice 1 ½ cups
Carrot, finely chopped 1 medium
French beans, finely chopped 4-6
Spring onions with greens, finely chopped (Reserve some spring onion greens for garnish)
Green Capsicum 1 small finely chopped
Oil 1 tbsp.
Garlic, finely chopped 2-3cloves
Red chilli sauce (readymade) 1 tbsp.
White pepper powder 1/4 tsp.
Salt to taste
Vinegar 1 tbsp. 
and Home-made Schezwan Sauce


and for Chicken Fried rice - 2 breast pieces of boneless chicken cut into chunks


Heat oil  and add garlic, spring onions(white), carrots, frech beans, capsicum and stir-fry for one minute. Now reduce the gas flame and add the schezwan sauce, white pepper powder and salt and mix well. Add rice, red chilli sauce, spring onion greens, vinegar and mix it tossing continuously. Serve hot, garnished with the reserved spring onion greens.


For chicken Fried Rice:- 

Marinate the chicken in soy sauce for 30 mins. Heat oil and add garlic,saute for a minute. Now add chicken pieces ( not the soy sauce) and stir fry it. Let the chicken get cooked by stir frying it. Once chicken gets half cooked; add spring onions(white), carrots, french beans, capsicum and stir-fry again. The chicken and vegetables should be cooked together and the later is cooked to the  point that they don't lose the crunchiness.  Now reduce the gas flame and add the schezwan sauce, white pepper powder and salt and mix well. Add rice, red chilli sauce, spring onion greens, vinegar and mix it tossing continuously. Serve hot, garnished with the reserved spring onion greens.